How To Use Epoxy Coating On Garage Floors
Applying epoxy paints on the garage floors is an ideal way to enhance the look of your garages. Not only does it increase the aesthetic beauty of the space but also promises durability for several more years.
However, before proceeding with the project, you have to keep some facts into consideration. Firstly, proper preparation is very must prior to applying the coats. Secondly, use high-quality epoxy paints.
Wondering how to utilize the epoxy coating? Keep reading the article to know the right procedure.
A Complete Guide To Apply Epoxy Paint On Garage Floors
Step 1: Prep The Garage Floor Area
It should be the first step as without it the epoxy paint might not stick properly on the concrete. If there is any caulk or dried paint, just scrape it off. You can use a scraper and putty knife to do the process.
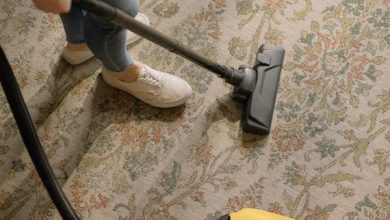
Next, with the help of a vacuum cleaner, remove all the dust and dirt from the floor. You can dust off corners and wall seams using a small paintbrush. Wash the surface thoroughly and leave it for 5 hours to dry.
Step 2: Degrease The Garage Floors
Spray the water on the floor surface to find out the area where degreasing is required. If anywhere you see bubbles coming out, degrease that area.
In addition, degreasing the whole area will be the right choice. It will remove all the oil and grease residue so that the epoxy coating can adhere easily. Follow the specific instructions mentioned on the degreaser container by the manufacturers.
According to the instructions, you can mix 1 ratio of the solution with 4 ratios of the water. Next, pour it over the whole surface and scrub it off with a bristle broom. Wash the floor using the pressure washer and let it dry.
Step 3: Etch The Garage Floors
Etching the garage floors is a very important step in preparing the surface for coating. Mix the etch solution with warm water in the gardening water can according to the manufacturer’s directions. Spray it over the whole floor area. Consequently, it will open the concrete pores which increase the bonding of epoxy coating with the surface.
Next, scrub the floor using a bristle broom and then, wash the surface thoroughly with the help of a garden hose. Allow the floor to dry overnight. This will prevent the moisture trap under the epoxy. As a result, there will be no bubbles in the coating and possibly no peeling of the paint.
Step 4: Fill The Cracks And Joints
When the concrete is installed, there are many joints in it. So, for the proper adhesion of the epoxy paint, scrub off the stains and repair the cracks and joints.
Use the self-leveling filler to refill all the joints. Let it dry as per the manufacturer’s direction. Next, use sandpaper to smoothen the surface if needed. Make sure to give one more last cleaning to remove all the left dust.
Step 5: Cover The Walls And Baseboards
For the safe side, use the plastic sheet on the walls and baseboards. Use the painter’s tape to fix it in place. It will protect them from the epoxy paint that may splash while applying it.
Step 6: Mix The Epoxy Paint
Epoxy paints are available in different colors which you can use according to your choice. Here is the process of mixing up epoxy paints:
- Put the epoxy paint into a large container and then slowly add the hardener to it.
- Mix both the solution thoroughly for 3 minutes until it is consistent.
- Cover the container using a lid and let it sit for 30 minutes.
- Ensure that the container is away from the sunlight. It can become warm to touch as both the chemicals can react with each other.
Step 7: Apply The Epoxy Coating On Garage Floors
Make sure to use the epoxy formula within 2 hours after it is mixed. So, pour the epoxy mixture into a roller tray. Now with the help of a paintbrush, apply the paint all over the perimeter of the garage floors.
Once you are done with the whole outer edge of garage floors, use a roller brush to coat the rest part. Cover the section in a 10-by-10-foot manner. Repeat the process in the same way on the whole area while making sure the roller is rewet each time. Do not forget to keep your garage area fully ventilated. It will quickly dry the paint and escape its odor.
Step 8: Sprinkle The Multicolored Flakes
The multicoloredflake flooring is in trend as it adds a beautiful texture to the garage floors. Not only do they add an appealing pattern but also provide slip resistance. Apply them just after the last coating as they will adhere quickly. Wear the cleat soles to prevent footprints.
Grab a handful of flakes and toss them up in the air. Try to spread the chips as high as possible as it will distribute them evenly everywhere. Once the complete floor is sprinkled with flakes, let it dry overnight. Lightly sweep away the loose chips using a broom.
Summing Up
The epoxy coating can completely change your garage. Using and applying it in the right way can enhance the effectiveness of the floors for a longer time. So, do consider all the steps accurately and give your garage floors a smooth finished look.
Apart from this, if you are interested to know more about 5 Tips for Central Air Conditioning Repair then visit our Home Improvement category.


